How to: Animate with Photoshop
As you have probably noticed, GIFs and boomerangs are becoming extremely popular with their continuous looping effect. Although it’s great to quickly search for one online, we thought we’d provide a little tutorial on how to create your own digital flip books with Photoshop. Even though we’re focusing on an illustration, we hope this post inspires you to explore Photoshop’s options and capabilities.
The first step to bring your illustration to life is to completely draw the final step. Yes, it sounds like we’re jumping ahead here, but having the last frame in front of you with a low opacity (we lowered it to about 40%) will be extremely helpful throughout this process. For this example, we’re going to be using this flower:

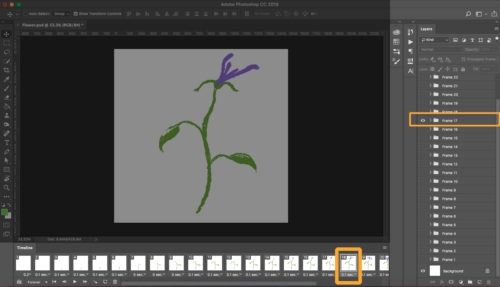
Now, you need to open a timeline by clicking Window > Timeline, then select Create Frame Animation. Once you see your timeline appear at the bottom, begin drawing each part of the flower on their own layer by clicking the new layer button in bottom right panel (the button looks like a page turning).


To keep things organized, we recommend grouping the layers you want visible in a single frame by selecting them all and hitting Command/Control G. Once you have these groups created, attach them to their own frames by clicking on a frame and making that group of layers visible (with the eye icon). In the image below, frame options are at the bottom and layer options are on the right.

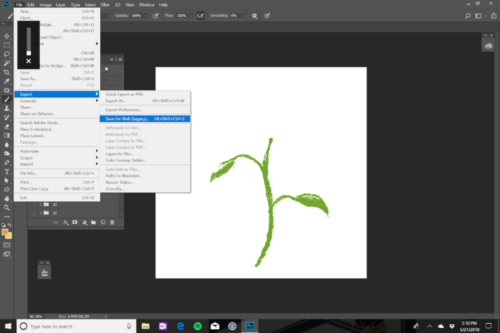
Once you have everything organized, set the delay time to around .1 or .2 seconds. For a clean movement, you’ll want around 12 drawings per second. After playing your animation and ensuring it’s the way you want it, it’s time to export by going to File > Export > Save for Web and then choosing GIF under the drop down menu.

That’s it! You now have your very own GIF. If it doesn’t look as great as the one below, don’t worry! It was done by one of our animators with years of experience. We would still love to see what you create so make sure to tag us @MEDLMOBILE
*

The Future of Live
Creating a User Experience without a User Interface
